
Should I Create a Resource for My Webinar?
- Does this resource teach a lesson?
- Can it stand on its own?
- Does it contain public, non-proprietary info?
- Can we promote it in CCI’s monthly newsletter?
If the answer is YES to all of the above: Start working on that Resource!
If the answer is NO to any of these questions: Do not post. (Skip to the bottom of this article.)
How to Build a Resource Article
Goodbye, Old Webinar Entries
Hello, New Webinar Template
Click here to see the fixed version:
Patient Engagement Series: Advisory Councils Share Their First-Hand Experiences
Copy This Template into an Article
HEADLINE:
This Title Is In Plain English, No Numbering or Hashtags
BODY:
A quick, catchy summary of the webinar goes here. Write one or two sentences, then change the font under the “Format” menu to “Intro Text.”
In your second paragraph, list out the speakers on the webinar. Maybe provide context of the sponsor or partner in this learning session. This is regular “Paragraph” font.
Who should watch this webinar? (This is headline 4)
Yes, it’s useful for program participants to revisit webinars. But think bigger: Outside of CCI programming, who else would find this webinar helpful? Clinicians? Front-desk staff? Community activists?
Our big takeaways:
- You can do anywhere from one to three takeaways.
- Keep them snappy!
- Ask yourself: What did you learn?
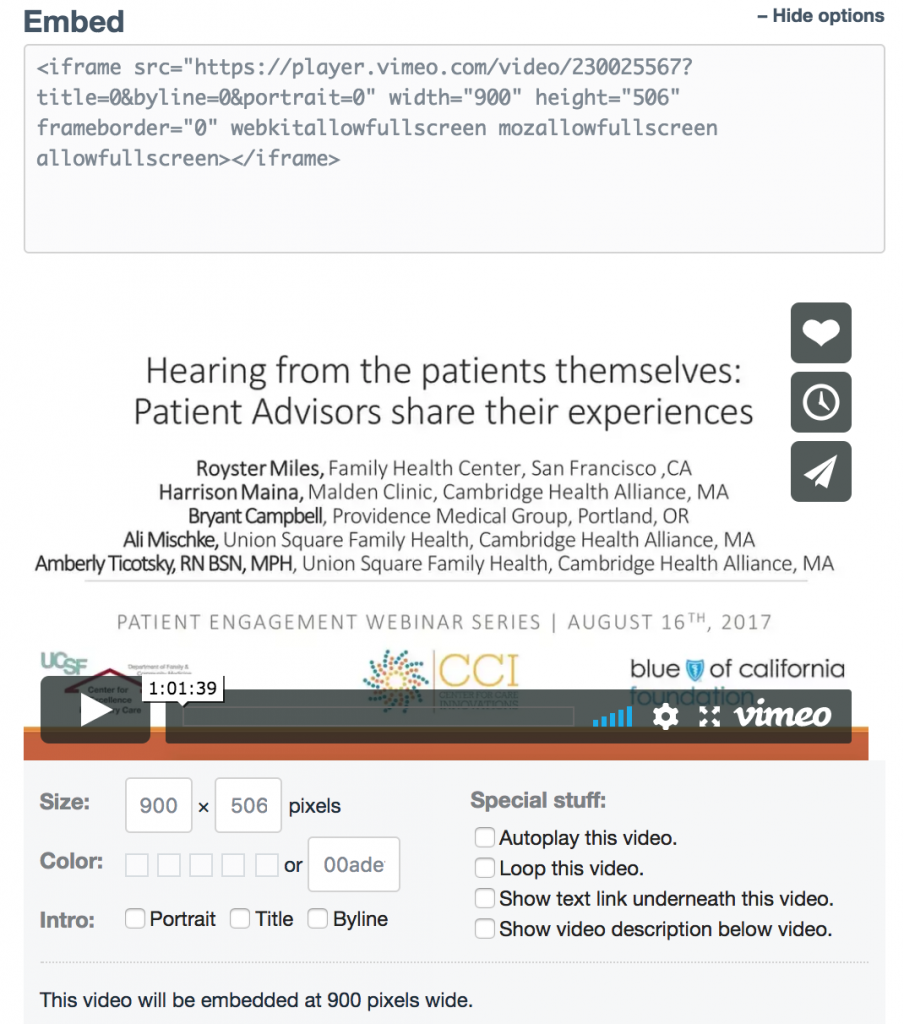
Toggle over to the HTML text and embed Vimeo video code here.
Vimeo Settings
The video size is 900 x 506 px.
Do not click any of the special add-on features:
Checklist
Right-Hand Fields
- Article Type: Knowledge Share
- Author: Center for Care Innovations
- Focus Area
- Featured Image: 1400 × 500px
- Program
Left-Hand Fields, Below Content Editor
- Yoast SEO: This is how your Resource Article will look in Google and other search engines. If the title is too long, it won’t fit. Click “edit snippet” to manually override the text.
- Try to squeeze in “Center for Care Innovations” or “CCI” into the SEO Title.
- The “meta description” gets pulled from the Excerpt section of the editor. See next bullet.

- Excerpt: This is what appears in the “meta description” above. It’s also the summary that appears on the front on each Resource Card.
- Download: Upload slides here if you’re including them.
- Program: You need to add the Program a second time. (What you are seeing, is because the relationship field on the left is associating the resource itself with a specific program page. The taxonomy field on the right is associating the resource with a specific program taxonomy.)
- Related Resources: Click on webinars in this series. Or Perspective pieces on the same topic. What do you want people to read/watch next?
- Call To Action, or CTA. This email sign-up box automatically appears on all pages, unless you click this box to make it disappear.
If the Answer is NO
On Vimeo, you can select from the following privacy options to determine who can see your video:
- Anyone – Allow anyone to see this video.
- Only me – Make this video visible to me and no one else
- Only people I follow – Make my videos visible only to people I follow on Vimeo (Note: this setting will make it so that people you follow will see your video in their feeds)
- Only people I choose – I’ll select people with whom I want to share this video (Note: this setting will only work for sharing with other Vimeo members)
- Only people with a password Protect this video with a password (Note: you can share password protected videos with non-Vimeo members)
- Only people with the private link – Make video visible only to people who have the link. (Your video cannot appear in channels or groups, and any credits you’ve added will be removed.)
- Hide this video from vimeo.com – This video can be embedded on other sites but can’t be viewed on vimeo.com. (Your video cannot appear in Channels and Groups but can still be added to Albums and Portfolios.)
How “Only People with the Private Link” Works:
- Go to your video settings and choose “Only people with the private link.” Or, select this option when you’re uploading.
- Once you save your changes, you’ll be given a private URL to copy and send to people you choose.
- Only people with this link (and people those people share it with) will be able to see your video page. It will be hidden from other groups, channels, search results, and other places on vimeo.com, and people won’t be able to find it through third-party search engines either.
You can then email out this link. Or post it in your Team Huddle.