
Some background on why we need to do this:
Saving Images for Web in Photoshop
1. Open Photoshop, and your image file.
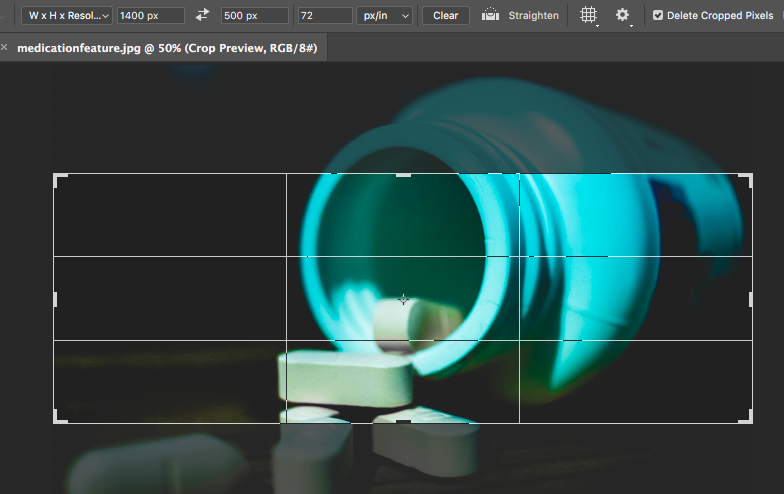
2. Check image size to make sure it is set to 72dpi and color settings are set to sRGB mode. Double check those dimensions are correct and are in pixel format. Crop if necessary:
- Header & Stats BKGD Images: 1400 × 500px
- Inline Article Images: 900px × Varying Height
- More photo size guidelines here.
3. From the file menu choose File > Export > Save for Web, and you will presented with the screen below:
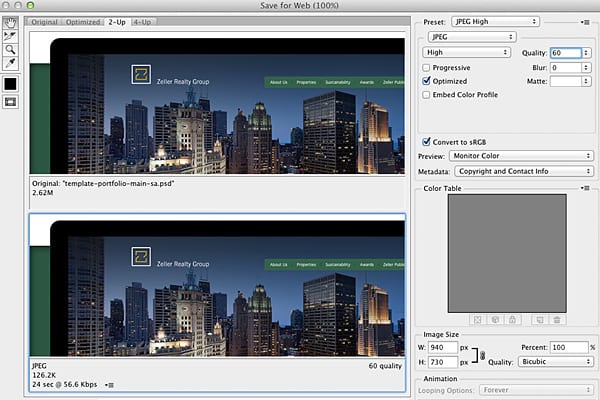
In the top left corner of the Save for Web window are a series of tabs labeled Original, Optimized, 2-Up and 4-Up. By clicking these tabs, you can switch between a view of your original photo, your optimized photo (with the Save for Web settings applied to it), or a comparison of two or four versions of your photo. Choose “2-Up” to compare the original photo with the optimized one. You will now see side-by-side copies of your photo.
Choose “2-Up” to compare the original photo with the optimized one. You will now see side-by-side copies of your photo. The second photo is the optimized photo – check to see that its not pixelated.
4. Click on the second photo. Choose “JPEG High” from the Preset menu. You can now compare your optimized photo (which will eventually be your final file) with your original. Depending on the quality of the photo, you may be able to use “JPEG Medium,” but double check that you aren’t pixelating your photo.
In the example above, you can see I decreased the file size from 2.62M to 126K– this is a HUGE difference and will increase productivity/load time on your site tremendously.
Adobe has a great video tutorial here if you would like to watch how its done.
Where to Source Images
Start with the CCI Image Library on Flickr.
If you can’t find anything there, try: